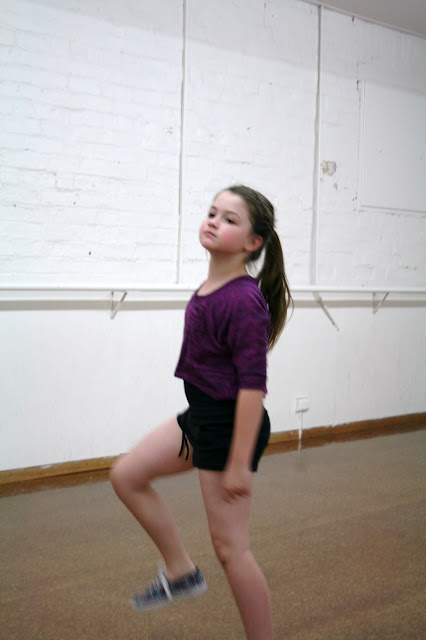
Certainly not my cup of tea but she sure does love it.
And who am I to argue.
Smile and nod.
Pay for the lessons.
And try not to giggle.
Watch out Beyonce.
Wednesday, March 28, 2012
Sunday, March 18, 2012
Bunting
Love.
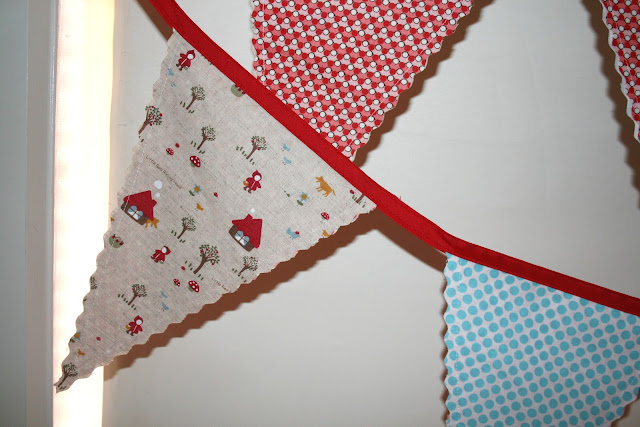
Perfect to brighten up Cate's room, the window has a blind but no need for curtains as quite a dark room. I made 5 metres of bunting, so should of measured her window but solved the too many flags predicament by tying the sides across the top. Shows the red back print but I think it looks nice.
I used some left over charm squares from her quilt, some KAI dots and some Japanese Little Red Riding Hood fabric from Spotlight. The scalloped edges are my fave, i used my new Olfa cutter for this.
Close up of the Japanese little red riding hood fabric, ultra cute and only $15m, less if you can pick it up on sale like I did.
And my detailed stitching, loving my zipper foot at the moment, such a nifty little foot allows you to sew close to the edge of any project without actually going over the edge.
Nice to sew something quick and easy from start to finish in just a few hours.
Wednesday, March 14, 2012
A Festival of Quilts
Cate and I went to a quilt show last Sunday. Held at the Mining Exchange as part of the Begonia Festival, the display was put on by a local quilt group the Begonia Quilters.
I always seem to like the same sort of quilts, fairly easy to sew but such nice colours. I like traditional quilts with bright modern fabrics. Cate loved this wolf one, made using a variety of sewing and embellishing, although she did say that it could do with some sequins!
The blue Christmas one stood out for me, would make an excellent bee quilt. Can never have too many Christmas quilts and wall hangings.
And this bright bargello, not a fan of the bargello but this one was striking, I think the squares were 3" so that's alot of cutting.There were some local quilt shops too, I bought a FQ bundle, a 1.5m remnant and 1m of Japanese Girl and cat print. In and out in less than 30 minutes, a great effort for a small group of 20 quilters.
Monday, March 12, 2012
Sherbet Pips Cushion
I have been making cushions for the lounges but everytime I finish one it goes missing, the kids have snaffled them. So I thought I would make them a cushion each for there rooms, starting with Cate as she is the loudest.
Using one of my Sherbet Pips 2.5" charm packs, I layed them out in rows 6 x 6 and omitted 2 squares for a rectangle of white homespun. After piecing the top, I used my free motion foot and stitched Cate's name in blue to match.
Sandwiching the top, I used my walking foot to add simple quilting down the sides of each square.After a quick google search, I used some premade bias binding and made some piping and attached to the front.

Another google search to help me remember how to insert a zip, I pieced the backing, added the zip, attached to the front and trimmed to fit. Turned inside out and wallah, we have a cushion.
I only had a 14" cushion insert so I cut it open, removed some fill then overlocked down to 11" and Cate's cushion is done. Quite time consuming, maybe 3 hours with some mild interruptions.
Equipment used; Bernina sewing machine with quarter inch foot, walking foot, zipper foot and the open toe darning foot, overlocker for resizing the insert. Now onto Stuart's cushion, he wants a green one.
Saturday, March 10, 2012
Bee block # 2 Granny Squares
My turn to host the Bee Blocks, I have chosen the block "Granny Squares". Swappes please use this tutorial here by Blue Elephant Stitches. I have sent out a pack with links, instructions, white and lots of little coloured squares in modern fabrics. Colours chosen are pink, aqua, orange, grey and purple, feel free to swap from your own stash, I know we all have excellent taste in fabric. Remember, no army green!
Step 3. Add the white squares, looking pretty
Step 4. Keeping it real, note Muffin fed and asleep on the floor?
Step 5. Pin Pin Pin! Fabric squares made up from 100% quilters cotton, cheap fat flats, linen and blends so they sew together differently. Try to make your block seams match up but don't stress.
Step 6. Ta dah! One finished, pressed and trimmed block. Please don't trim your block, I will do this when I add the sashings. I used spray starch to press my seams inwards so the coloured prints don't show through the white.
And a close up of Auntie Cookie. See my corners don't match up? Auntie cookie is on linen, I blame the linen.

Quilt will be our future picnic rug so I have added lots of cute prints to the selection, it's not an eye spy, more a modern character look. Can't wait till the blocks come back, I love the one I have made and have been admiring all the flickr ones too, great inspiration.
Step 1, trim all squares to 2.5", each block needs 13 coloured squares and 12 white. I have not chosen any colour layouts, just go with whatever looks nice to you. I do however suggest you remove all cats from the area or feed them first or prepare for sabotage.
Step 2. Lay out your coloured squares againStep 3. Add the white squares, looking pretty
Step 4. Keeping it real, note Muffin fed and asleep on the floor?
Step 5. Pin Pin Pin! Fabric squares made up from 100% quilters cotton, cheap fat flats, linen and blends so they sew together differently. Try to make your block seams match up but don't stress.
Step 6. Ta dah! One finished, pressed and trimmed block. Please don't trim your block, I will do this when I add the sashings. I used spray starch to press my seams inwards so the coloured prints don't show through the white.
And a close up of Auntie Cookie. See my corners don't match up? Auntie cookie is on linen, I blame the linen.

Quilt will be our future picnic rug so I have added lots of cute prints to the selection, it's not an eye spy, more a modern character look. Can't wait till the blocks come back, I love the one I have made and have been admiring all the flickr ones too, great inspiration.
Subscribe to:
Comments (Atom)


